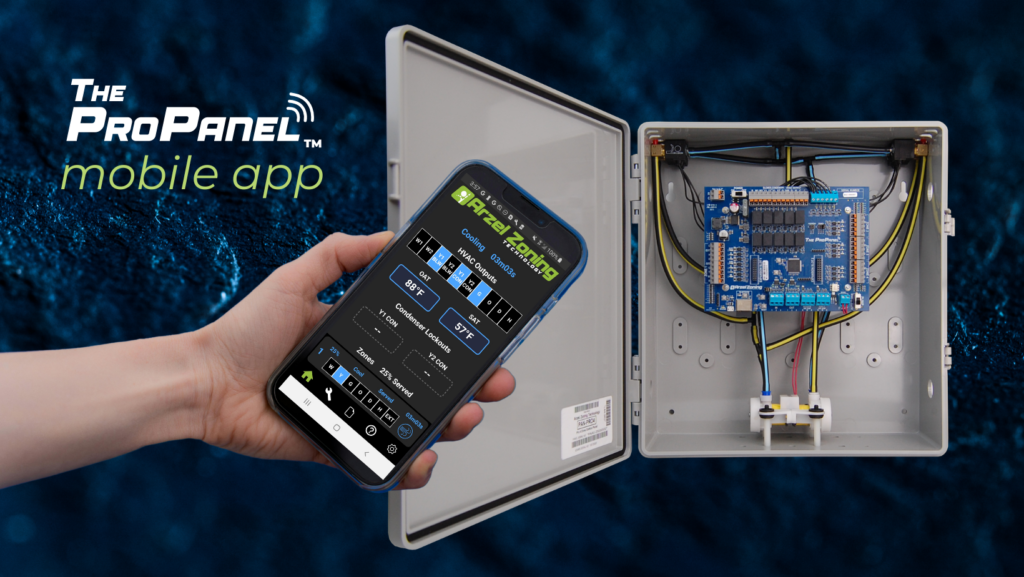
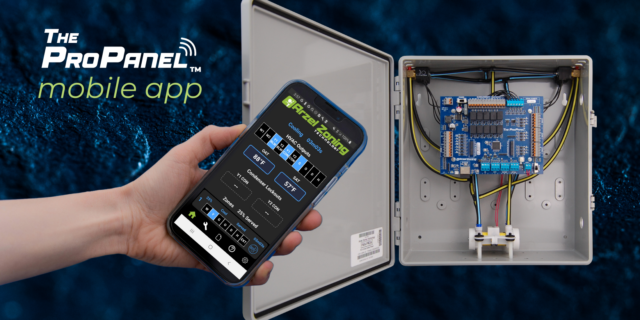
The Arzel Pro Panel app gives contractors more control, easier setup, and better troubleshooting capabilities. All of that comes in a no-nonsense package. The app is simple to connect and doesn’t require Wi-Fi or cell service. We’re proud that the Arzel Pro app makes the Pro Panel our most customizable panel. And it’s still easy to install.
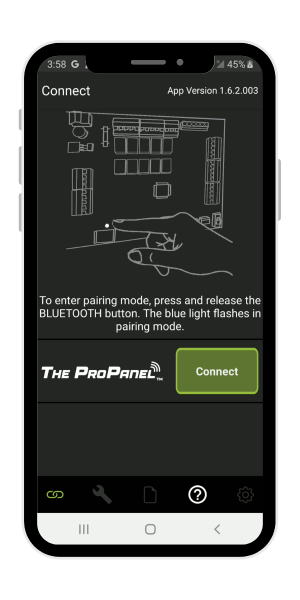
When you’re installing a Pro Panel, just turn the panel on and then open the Arzel Pro app. Your Pro Panel will pop up on the connection screen (see photo). Tap connect to pair your device with the Pro Panel.
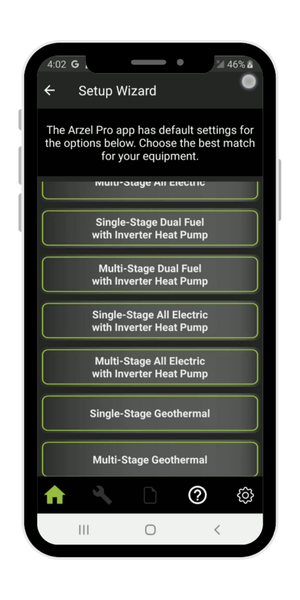
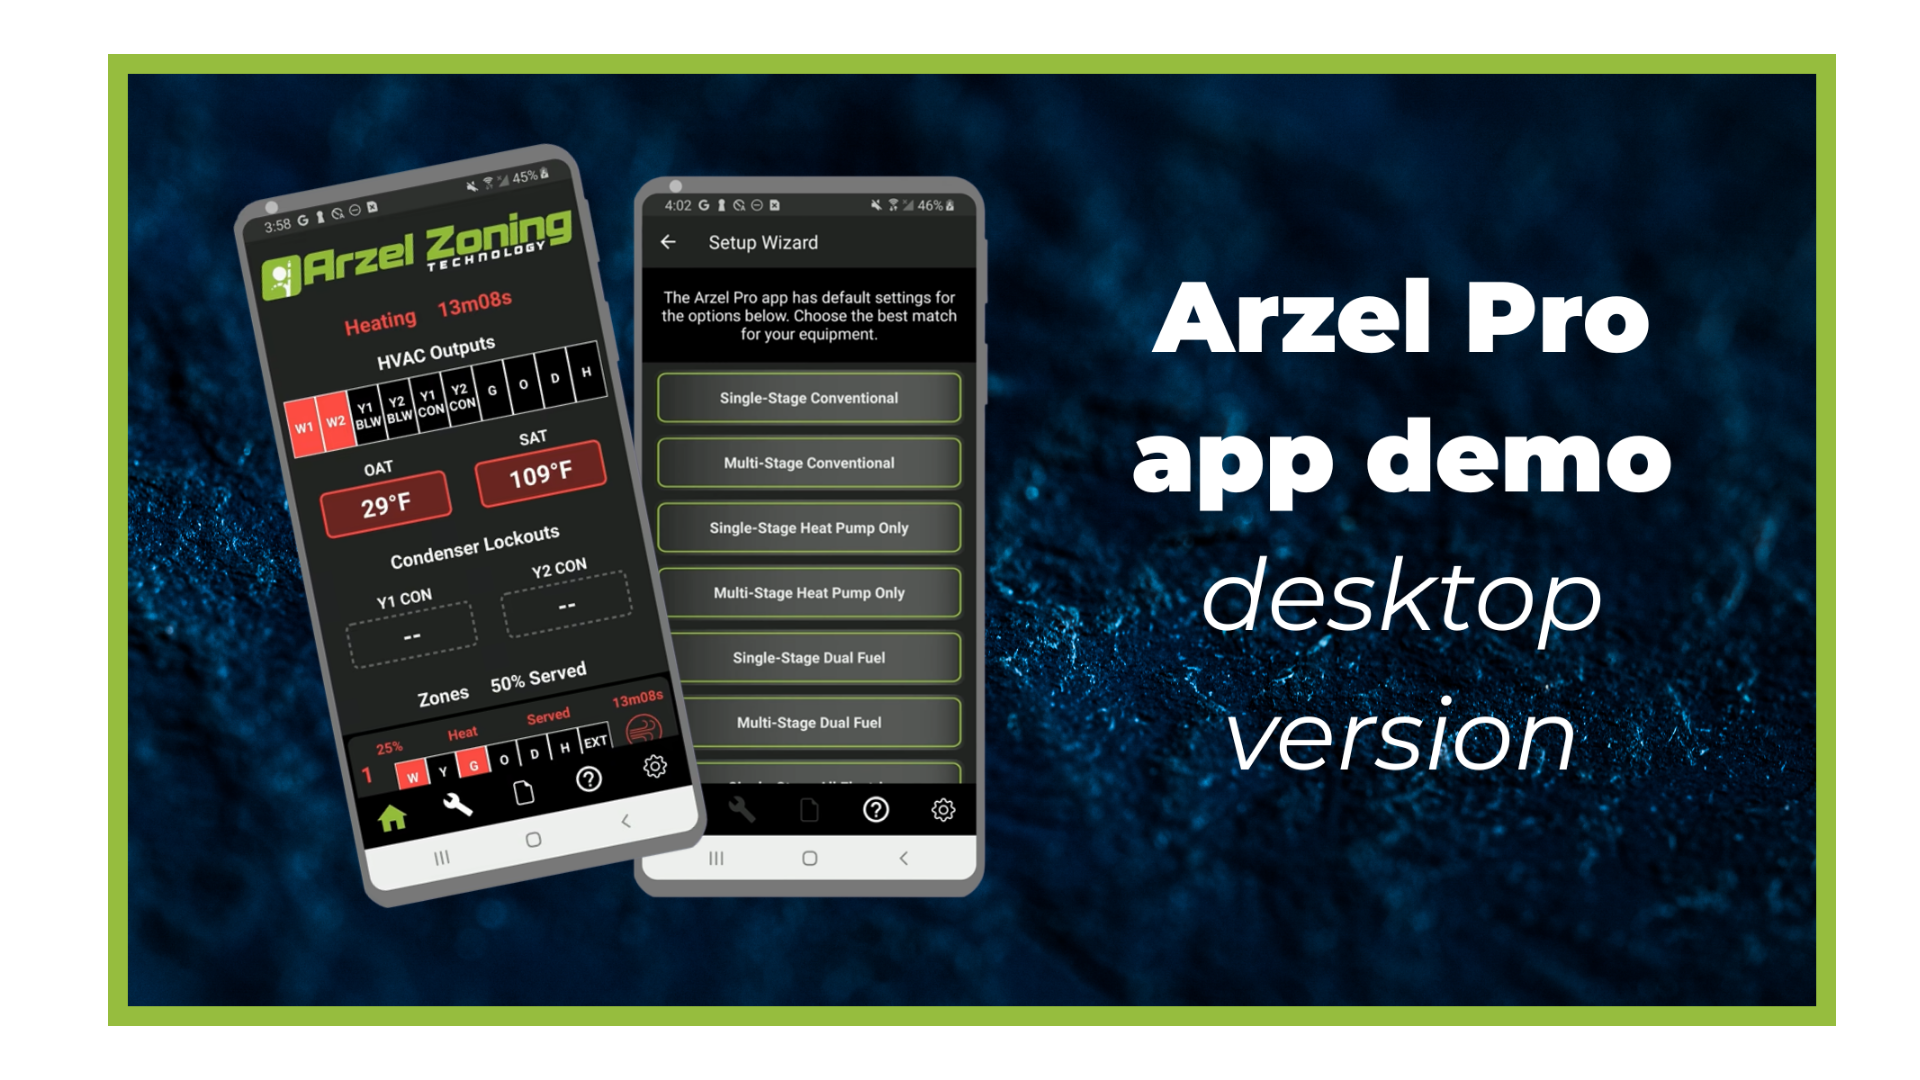
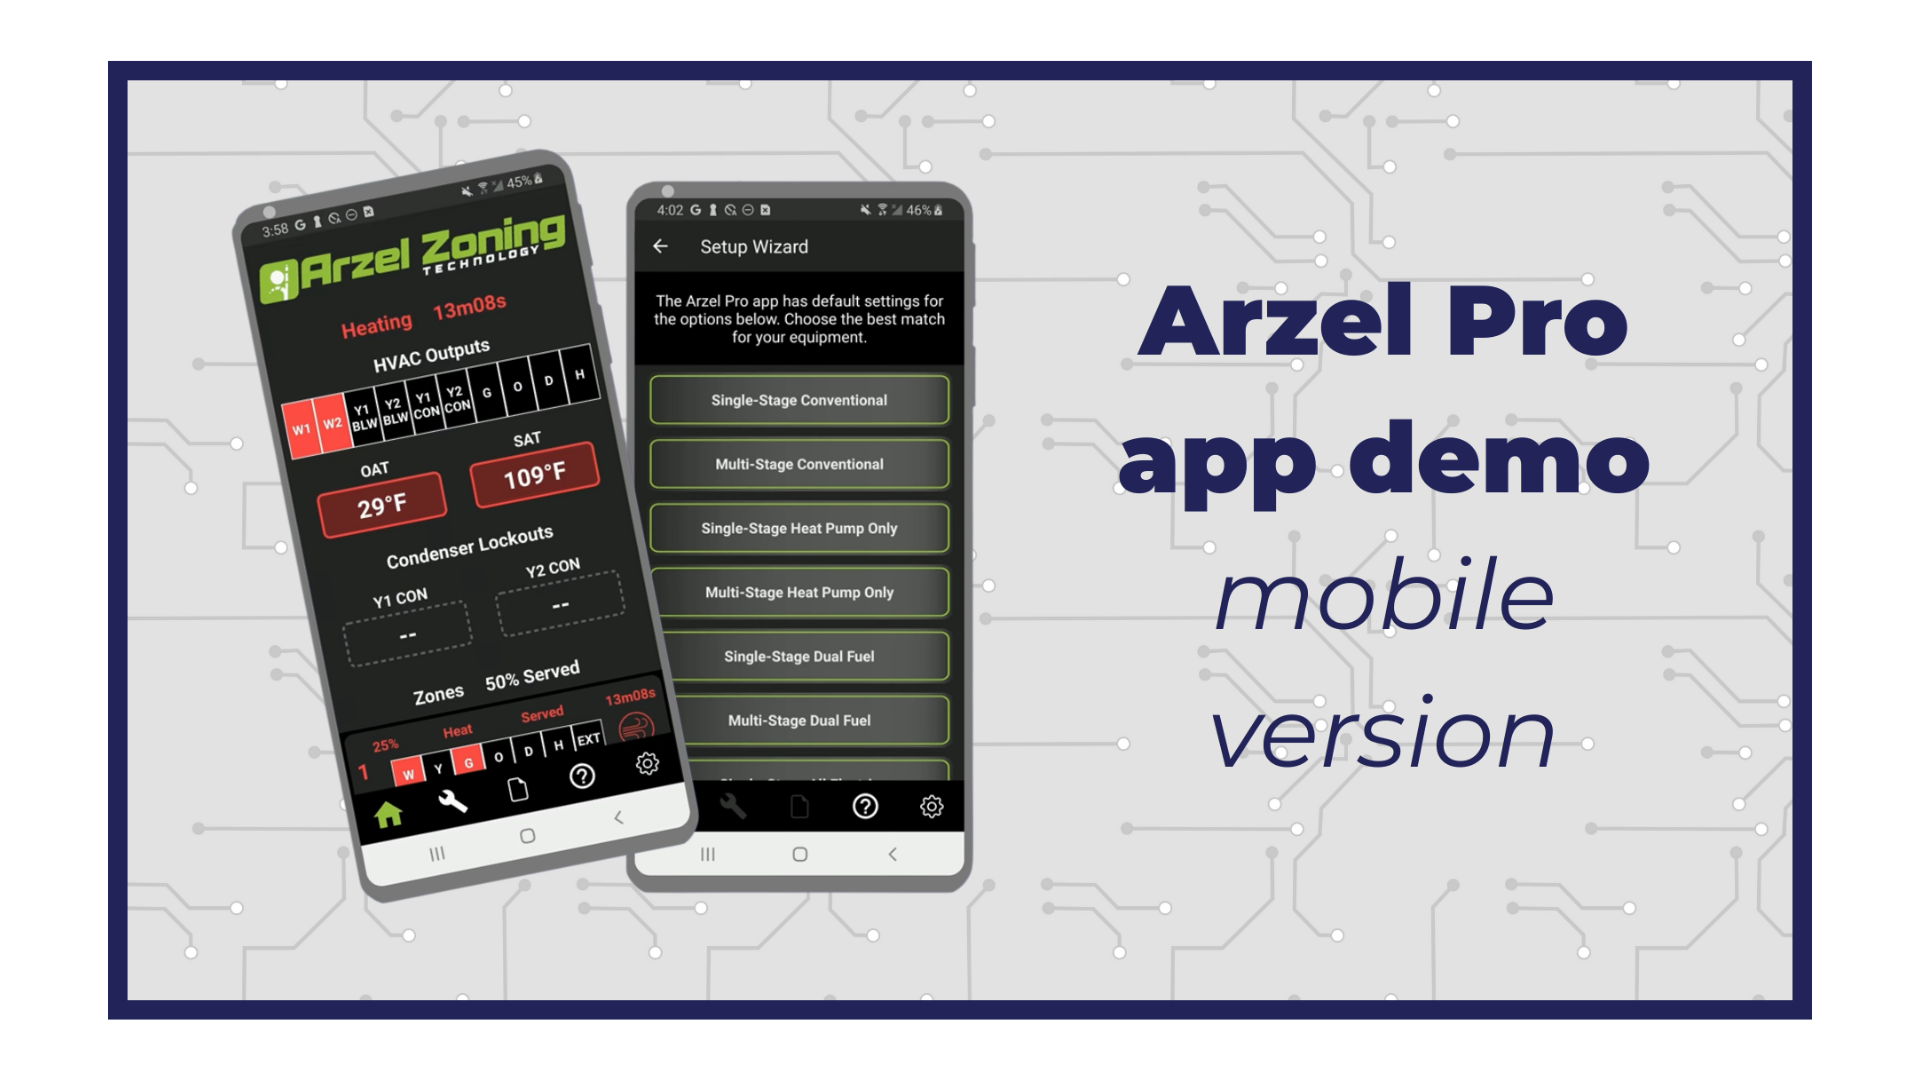
Since your Pro Panel has never been set up before, the first screen you will see is this setup screen. Tap to begin setup. Then, simply choose your equipment type from the list. You’ll see less common options like Heat pump with fossil fuel backup and Geothermal package unit, so the one you need is probably there. If you don’t see the specific application you’re installing, just pick the one that matches most closely. You will still be able to fine-tune the settings later.
After that, you can either review each setting to make sure it does what you want, or skip to the end. We recommend checking each setting, but if your application is pretty simple, you can depend on the default settings to work well. That’s what we call one-tap setup. Just choose your equipment, and all your settings will populate!
The Arzel Pro Panel app has a long list of settings because we’ve made it as customizable as possible. Adjustable staging timers and temperatures let you optimize whatever type of equipment you have. You can set zone weights to lock out second-stage operation on smaller zones. It’s also possible to choose the supply temperature that causes the equipment to stage up, and the amount of time between stages. We know you don’t have the time to read up on every setting though, so we put an info button next to every setting. If you’re not sure what a setting does, just tap info to learn more.
You can always return to the settings list by tapping the wrench icon at the bottom of the screen. And to learn more about all of the Pro Panel settings, see the Pro Panel installation manual.
We tried to make setup with the Arzel Pro Panel app as easy as we possibly could. To make it even easier, here’s a list of settings you will want to keep in mind. To get the most out of the Pro Panel, you may want to adjust these settings manually.
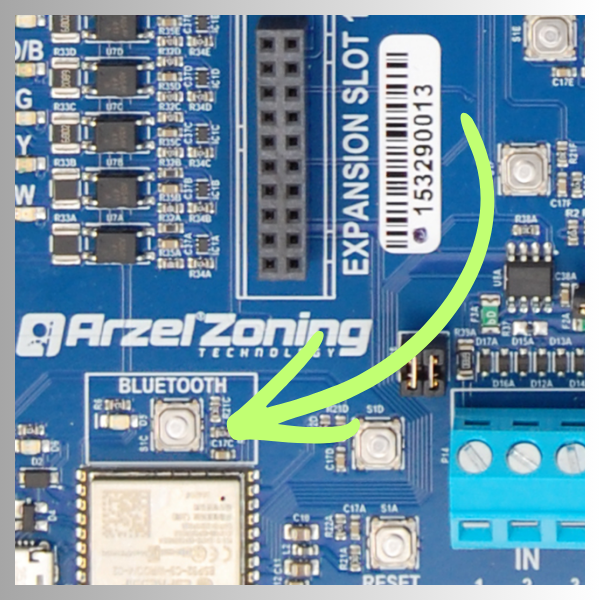
You can also connect the Arzel Pro Panel app to a Pro Panel that’s already set up. To put the system in pairing mode, press the Bluetooth button on the Pro Panel circuit board (see photo). The blue light next to the Bluetooth button will flash to let you know it’s in pairing mode. Then, open the app, and your Pro Panel should pop up. Tap Connect to pair your device with the panel.
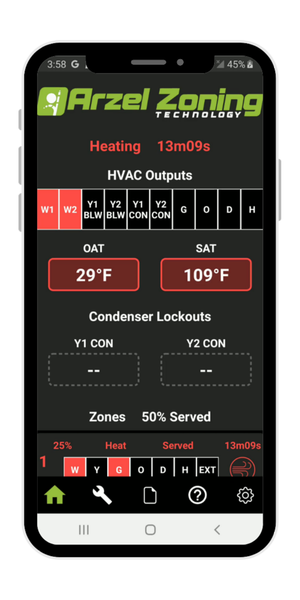
On a Pro Panel system that’s already set up, the first screen you will see is a dashboard that shows current system information. The current status is at the top of the screen. This line of text will say what type of call is being served, and how long the system has been in that mode. Then you can see which HVAC outputs are currently energized. After that, you’ll see the temperature readings coming from the Outdoor Air Temperature (OAT) sensor and the Supply Air Temperature (SAT) sensor.
As you scroll down the page, you’ll be able to see what each zone is calling for and whether it’s being served. A percentage on each zone shows the zone weight that’s been assigned to that zone.
You can always return to the dashboard by tapping the home icon at the bottom of your screen.
If you’re troubleshooting an issue with a Pro Panel, or with the HVAC equipment it’s attached to, you might want to see the system logs. Find the system logs by tapping on the folded page icon at the bottom of the screen. You’ll be able to download the system logs to your device.
When you need information you can’t find in the app, visit our help area by tapping on the question mark icon at the bottom of the screen. This screen will get you the help you need quickly. You might want to call Arzel Tech Support, register the product for a warranty, or find a manual in our knowledge base. Find any of these things with a couple of taps in our help area.
Tap the gear icon to see the settings for the app itself. This is where you can update the firmware on the connected Pro Panel if there’s an update available. You can also switch between Celsius and Fahrenheit here. And if you want to use demo mode, you’ll find it in app settings.
You can download the free Arzel Pro Panel app in the app store for your device. To get the full experience, you’ll have to connect to a Pro Panel. If you don’t have one nearby, try the Arzel Pro app demo video.
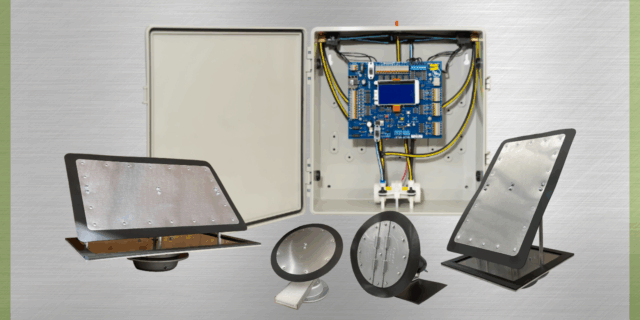
Our new Pro Panel control can zone up to 16 zones. That’s twice as many as our biggest AirBoss, and four times what our HeatPumPro can do. With 16 zones possible, the Pro Panel can be a zoning solution for more light commercial buildings and large houses. On top of the additional zones that are […]
The Arzel Pro Panel app gives contractors more control, easier setup, and better troubleshooting capabilities. All of that comes in a no-nonsense package. The app is simple to connect and doesn’t require Wi-Fi or cell service. We’re proud that the Arzel Pro app makes the Pro Panel our most customizable panel. And it’s still easy […]
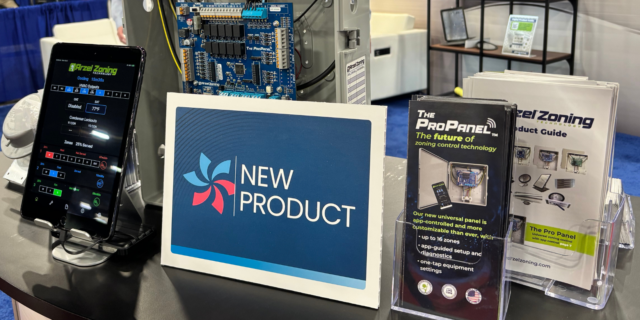
App-controlled HVAC zoning panel is feature-rich and highly customizable; pairs with trusted Arzel dampers Cleveland, OH (Feb. 10, 2026) – Arzel Zoning Technology, a trusted name in HVAC since 1983, is proud to announce a new zoning control: The Pro Panel™. This universal zoning control offers advanced control and a feature rich system, all with […]
An Arzel zone system can solve several comfort issues for your customers. How do you know when to recommend Arzel, and when you need to look for another solution? Here’s what an Arzel Zoning system can do, and what it can’t. Find the best solution for your customer’s needs with this guide. It’s Too Hot […]