There are three main steps to installing a Pro Panel zone control system:
After you complete these three steps, your customer will feel the difference immediately. This is one of our favorite benefits of zoning. Homeowners and building managers don’t have to wait weeks or months to see if the new installation is working. They will know as soon as they adjust the thermostat and feel the conditioning kick in.
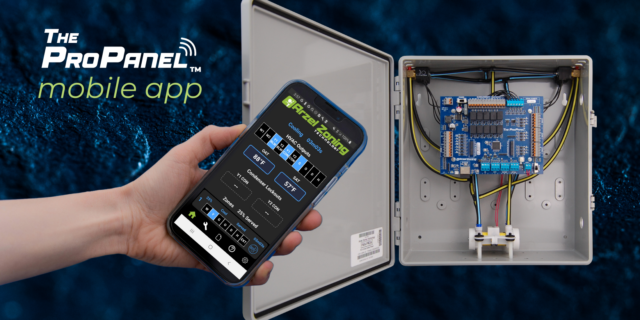
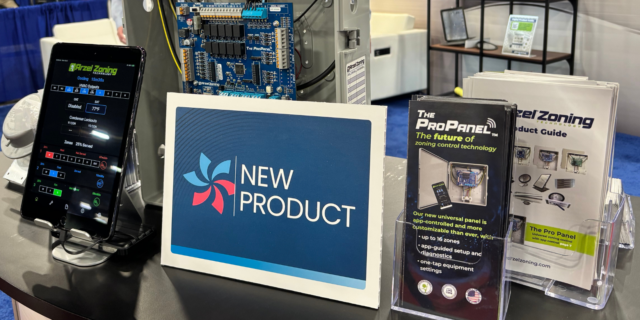
The Pro Panel uses an app to make setup and troubleshooting as simple as we could get it. But we all know that cell coverage can be unreliable, especially in basements, and you won’t always have easy access to Wi-Fi. The Pro Panel doesn’t require Wi-Fi, and you don’t have to have cell service to connect your device to the panel. Just download the Arzel Pro mobile app while you have service, and make sure the app is updated. Then when you get to your job site, your device will have all the information you need to install the panel. It will even be able to update the Pro Panel’s board software if needed. You’ll use Bluetooth to connect your device to the Pro Panel.
The first step of any Arzel Zoning installation is to install the dampers. Like all Arzel zoning systems, each Pro Panel can control up to 35 dampers. That’s more than most zoning systems. It gives you the option to design the system exactly the way you want it. If it works, you can simply add a damper to the trunk for each zone. But maybe you want to group the rooms differently. You can also install a damper into each branch, which lets you divide the rooms up exactly how you want them. Learn more about Arzel damper options.
When you install each damper, turn it so that the connection port is pointing upstream, or toward the equipment. Then run a piece of tubing from near the equipment to the farthest damper in the first zone. The tubing fits on to the connection port, or nipple, of the damper. You won’t need any specialized tools. To add the other dampers on the zone, cut the tubing near each damper, and add a tee fitting. These barbed fittings don’t require any tools, either. You can just push them on to the tubing with your fingers.
Connect the cut tubing back together with your tee fitting, and run a new piece of tubing from the tee to the damper. Continue this process until all of the dampers for the zone are connected. After that, start with a different color of tubing for the next zone, and do the same thing until that zone is complete. You should end up with one tube for each zone running back to where your Pro Panel will be installed. Watch a tubing installation.
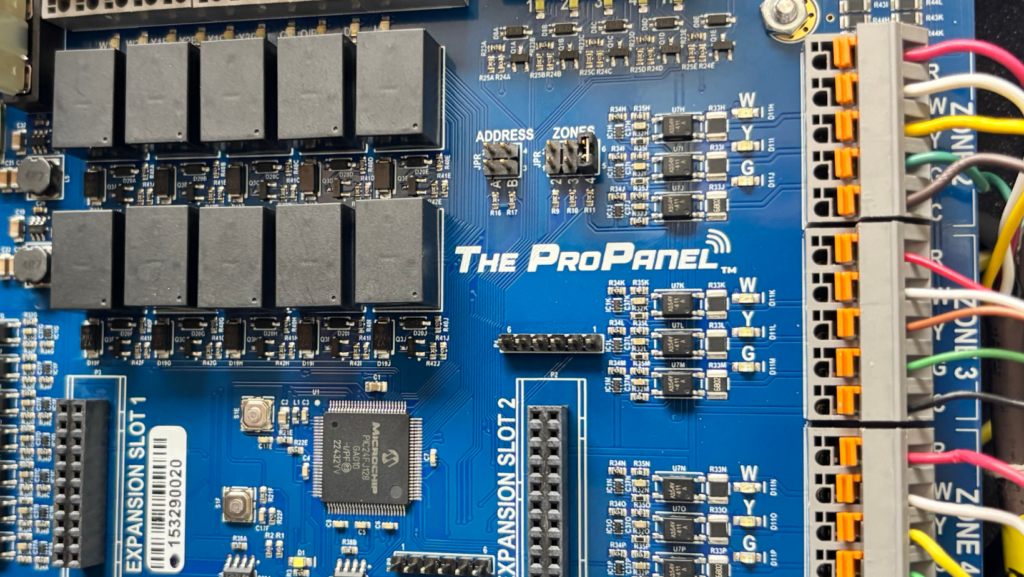
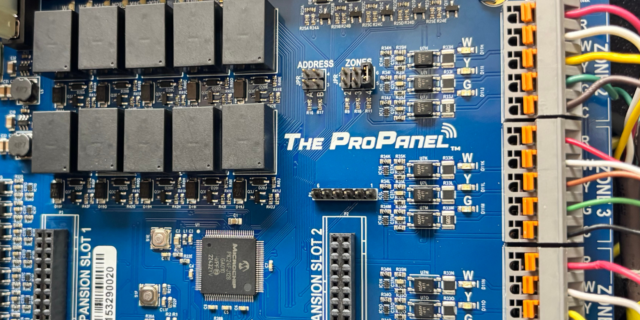
The Pro Panel needs to be mounted vertically in a non-condensing, semi-conditioned area where temperatures will not normally exceed 140 °F. Do not mount an Arzel panel on ductwork, on HVAC equipment, on a stairwell, or on a bedroom wall.
The best mounting method is to attach a piece of ¾-inch plywood to an exterior stud wall or foundation. Hold the panel level on the wall and mark the positions of the upper mounting holes. Drive two screws into the wall on your marks, leaving the heads of the screws at least half an inch from the wall. Set the panel over the two screws. Drive two screws into the lower mounting holes. Then, tighten the upper screws. Finally, you can connect the tubing for each zone to the corresponding port on the top of the panel. Simply remove the red cap for the zone, and replace it with the end of the tubing that you ran to that zone’s dampers.
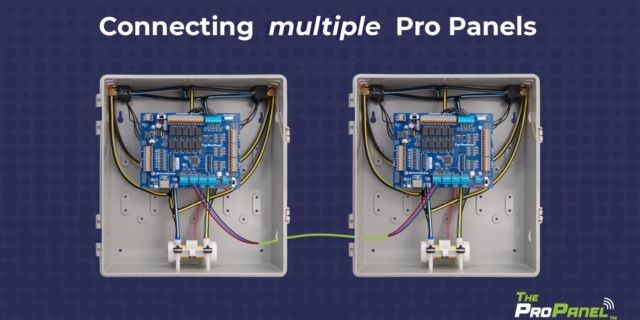
You may be installing more than one Pro Panel. You can connect up to four panels to create a single zoning system with up to 16 zones. Learn how to daisy-chain Pro Panels together.
Touch a mechanical ground to discharge any static electricity before you make any electrical connections.
Then, install a thermostat for each zone. Use 18-gauge, multi-conductor, solid thermostat wire to connect each thermostat to the control panel. You’ll see a label on the board for each zone. Zone 1 can use a standard heat/cool thermostat or a heat pump thermostat. You never need to use a heat pump thermostat, but you can if you want to be able to control emergency heat from the thermostat. The other zones need to have standard heat/cool thermostats.
After you install the thermostats, document the location of each one in the Zone Layout label on the side of the Pro Panel.
Next, connect the HVAC equipment to the Pro Panel. Use 18-gauge, multi-conductor, solid thermostat wire and connect the equipment to the board where you see the label HVAC Outputs. For the Y contacts, you will connect Y1/Y2 Blower to the air handler or furnace controls and you will connect Y1/Y2 Condenser to the heat pump or air conditioner controls. The two C terminals will connect the furnace or air handler transformer to the common circuit of the heat pump or air conditioner controls.
Refer to the Pro Panel manual for wiring diagrams that show how to wire specific equipment and equipment combinations.
Again, use 18-gauge, 2-conductor, solid wire to connect the R and C power input terminals to the mounting screws on the transformer. The Pro Panel transformer ships in the box with the panel, and is a 40 VAC self-resetting plugin transformer. Using a different transformer may void the warranty on your Pro Panel system. Plug the transformer into any standard 120 VAC receptacle, but wait to turn on the panel until after you have connected the sensors.
The Pro Panel ships with two identical sensors (replacement part SEN-RESPRO). One sensor will be the Supply Air Temperature (SAT) sensor, and the other will serve as the Outdoor Air Temperature (OAT) sensor. If you need additional wire length for the sensors, you can add up to 50 feet of 18-3 thermostat wire.
Install the SAT sensor in the supply duct 12–18 inches from the plenum. The SAT sensor must be located downstream of the heat exchanger and cooling coil and before any dampers.
Install the OAT sensor outdoors. It works best on the north side of the house, out of direct sunlight. A metal housing for the OAT sensor is included in the Pro Panel box. You do not have to install the OAT sensor if the Pro Panel is not controlling a heat pump. (However, with our HeatPumPro, you do have to install the OAT sensor in all applications.)
When you wire the sensors to the Pro Panel, you must connect the wires to the corresponding terminals. Connect the red wire to the R terminal, connect the white wire to the W terminal, and connect the black wire to the B terminal.
Use the power switch to turn the panel on. It will automatically enter pairing mode, and you will know it’s ready to pair when you see a flashing blue light near the Bluetooth button near the lower left corner of the board. Open the Arzel Pro mobile app on your phone or tablet. You’ll see a green button that says Connect. Tap the button, and the Pro Panel will pair with your device.
If you’re installing a new Pro Panel that has never been set up, the app will ask if you want to begin setup. Tap to begin, and you’ll see a list of equipment types. Choose the one that most closely matches the equipment in your installation. You will still be able to make changes later.
When you finish setup, the Pro Panel will start running. You will notice the difference immediately. That’s one of the nice things about zoning. Sometimes we install HVAC solutions that aren’t noticeable right away. With zoning, the people in the home or business will be able to tell things are different from the very beginning. As soon as they set the thermostats where they want them, the Pro Panel will work to get each zone just how they want it.
Make sure your customers know where all of the thermostats are, and which parts of the building are grouped together in each zone. There’s a table on the first page of the manual where you can fill in this information so they can refer to it later. We also recommend filling out the Setup Worksheet at the back of the manual. This is a great reference if you ever need to come back out to this location to troubleshoot an issue.
Need more Pro Panel information? Visit the Pro Panel page, or see our Pro Panel playlist on YouTube.
There are three main steps to installing a Pro Panel zone control system: Install the dampers and tubing. Install the panel and thermostats. Connect to the Arzel Pro app to configure the Pro Panel for your installation. After you complete these three steps, your customer will feel the difference immediately. This is one of our […]
Our new Pro Panel control can zone up to 16 zones. That’s twice as many as our biggest AirBoss, and four times what our HeatPumPro can do. With 16 zones possible, the Pro Panel can be a zoning solution for more light commercial buildings and large houses. On top of the additional zones that are […]
The Arzel Pro Panel app gives contractors more control, easier setup, and better troubleshooting capabilities. All of that comes in a no-nonsense package. The app is simple to connect and doesn’t require Wi-Fi or cell service. We’re proud that the Arzel Pro app makes the Pro Panel our most customizable panel. And it’s still easy […]
App-controlled HVAC zoning panel is feature-rich and highly customizable; pairs with trusted Arzel dampers Cleveland, OH (Feb. 10, 2026) – Arzel Zoning Technology, a trusted name in HVAC since 1983, is proud to announce a new zoning control: The Pro Panel™. This universal zoning control offers advanced control and a feature rich system, all with […]